Free Online Books
A co-worker pointed me to a bunch of free online books. Looks pretty cool, I’ll have to check a couple of them out.
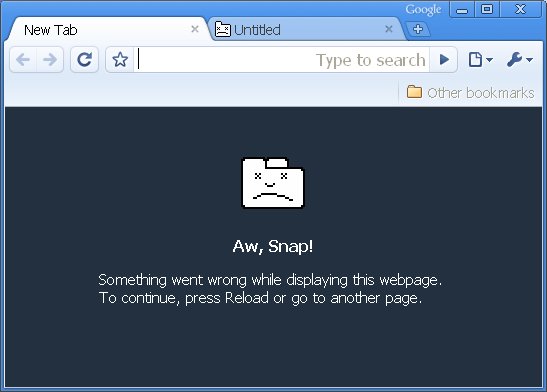
Google Chrome first experience
I just installed Google Chrome, a new web browser by Google.
Below is my first experience:
Allow rails users to login via vsftpd
So you’ve installed Ruby on Rails with Postgres, and now you want to allow your users to login to your server via FTP.
First we need to install our FTP server. (In the config window, I left the defaults)
[text]
freebsd-vm# cd /usr/ports/ftp/vsftpd
freebsd-vm# make install
cd /usr/ports/ftp/vsftpd && make config;
[…]
ports included in the Ports Collection. Please type ‘make deinstall’
to deinstall the port if this is a concern.
For more information, and contact details about the security
status of this software, see the following webpage:
http://vsftpd.beasts.org/
freebsd-vm#
[/text]
Edit the vsftpd conf file.
[text]
#vi /usr/local/etc/vsftpd.conf
# Remove all lines and replace with the following
background=YES
listen=YES
anonymous_enable=NO
local_enable=YES
virtual_use_local_privs=YES
write_enable=YES
connect_from_port_20=YES
secure_chroot_dir=/usr/local/share/vsftpd/empty
pam_service_name=vsftpd
guest_enable=YES
user_sub_token=$USER
local_root=/usr/local/www/apache22/data/$USER
chroot_local_user=YES
hide_ids=YES
ftpd_banner=Welcome to FTP server
file_open_mode=0770
local_umask=0000
anon_mkdir_write_enable=NO
guest_username=vsftpd
user_config_dir=/etc/vsftpd/users
[/text]
Create the vsftpd startup script.
[text]
# vi /usr/local/etc/rc.d/vsftpd
#!/bin/sh
#
# $FreeBSD: ports/ftp/vsftpd/files/vsftpd.sh.in,v 1.7 2006/02/20 20:47:01 dougb Exp $
#
# PROVIDE: vsftpd
# REQUIRE: DAEMON
# Add the following line to /etc/rc.conf to enable `vsftpd’:
#
# vsftpd_enable="YES"
# vsftpd_flags="/some/path/conf.file" # Not required
#
. "/etc/rc.subr"
name="vsftpd"
rcvar=`set_rcvar`
load_rc_config "$name"
: ${vsftpd_enable:="NO"}
: ${vsftpd_flags:=""}
command="/usr/local/libexec/$name"
required_files="/usr/local/etc/$name.conf"
start_precmd="vsftpd_check"
vsftpd_check()
{
if grep -q "^ftp[ ]" /etc/inetd.conf ${required_files}
then
err 1 "ftp is already activated in /etc/inetd.conf"
fi
if ! egrep -q -i -E "^listen.*=.*YES$" ${required_files}
then
err 1 "vsftpd script need "listen=YES" on config file"
fi
if ! egrep -q -i -E "^background.*=.*YES$" ${required_files}
then
err 1 "vsftpd script need "background=YES" on config file"
fi
}
run_rc_command "$1"
[/text]
We also need to install the Postgres PAM module.
[text]
freebsd-vm# cd /usr/ports/security/pam-pgsql/
freebsd-vm# make install
=> libpam-pgsql-0.6.3.tar.bz2 doesn’t seem to exist in /usr/ports/distfiles/.
=> Attempting to fetch from http://nchc.dl.sourceforge.net/sourceforge/pam-pgsql/.
[…]
to use this module. Note, that unlike most other ports, this port
installs a file into /usr/lib directly (/usr/lib/pam_pgsql.so),
because PAM requires that.
===> Registering installation for pam-pgsql-0.6.3_1
freebsd-vm#
[/text]
We need to tell vsftpd to use pam-pgsql for authentication.
[text]
freebsd-vm# vi /etc/pam.d/vsftpd
auth required pam_pgsql.so config_file=/etc/pam_pgsql_vsftpd.conf
account required pam_pgsql.so config_file=/etc/pam_pgsql_vsftpd.conf
freebsd-vm# vi /etc/pam_pgsql_vsftpd.conf
debug
pw_type = md5
connect = hostaddr=127.0.0.1 port=5432 dbname=<font color="red">sample_development</font> \
user=<font color="red">sample_user</font> password='<font color="red">password</font>’ connect_timeout=15
auth_query = select <font color="yellow">password</font> from <font color="yellow">users</font> where <font color="yellow">username</font> = %u
acct_query = select <font color="white">ftp_disabled</font> as acc_expired, \
0 as acc_new_pwreq, (password ISNULL or password = ”) as user_password \
from <font color="white">users</font> where username = %u
freebsd-vm#
[/text]
(Long lines above with \ in them should be one long continuous line in your config file)
The configuration above assumes three things:
- Your rails database name is sample_development and can be connected with the username sample_user and the password password (change red items as needed)
- Your rails users are stored in the users table. The password field is password and the username field is username (change yellow items as needed)
- Your rails users are stored in the users table. The ftp_disabled field holds whether they should be allowed access (false) or denied (true). (Change white items as needed)
We need to create the user for vsftpd to run as.
[text]
freebsd-vm# adduser
Username: vsftpd
Full name: FTP User
Uid (Leave empty for default):
Login group [vsftpd]:
Login group is vsftpd. Invite vsftpd into other groups? []:
Login class [default]:
Shell (sh csh tcsh nologin) [sh]: nologin
Home directory [/home/vsftpd]:
Use password-based authentication? [yes]: no
Lock out the account after creation? [no]:
Username : vsftpd
Password : <disabled>
Full Name : FTP User
Uid : 1002
Class :
Groups : vsftpd
Home : /home/vsftpd
Shell : /usr/sbin/nologin
Locked : no
OK? (yes/no): yes
adduser: INFO: Successfully added (vsftpd) to the user database.
Add another user? (yes/no): no
Goodbye!
freebsd-vm#
[/text]
Configure vsftpd to start on boot and manually start vsftpd once.
[text]
freebsd-vm# echo vsftpd_enable="YES" >> /etc/rc.conf
freebsd-vm# chmod 755 /usr/local/etc/rc.d/vsftpd
freebsd-vm# /usr/local/etc/rc.d/vsftpd start
Starting vsftpd.
freebsd-vm#
[/text]
Now we need to create a couple of users to test this with. Below we’ll create a user bob that can login and a user bob2 that can not login.
[text]
freebsd-vm$ psql -U sample_rails_app sample_rails_app_development
Welcome to psql 8.3.3, the PostgreSQL interactive terminal.
Type: \copyright for distribution terms
\h for help with SQL commands
\? for help with psql commands
\g or terminate with semicolon to execute query
\q to quit
sample_rails_app_development=> select * from users;
id | username | password | homedir | ftp_disabled | created_at | updated_at
—-+———-+———-+———+————–+————+————
(0 rows)
sample_rails_app_development=> insert into users (username,password,homedir,ftp_disabled) values (‘bob’,md5(‘bob’),’/home/bob’,false);
INSERT 0 1
sample_rails_app_development=> insert into users (username,password,homedir,ftp_disabled) values (‘bob2’,md5(‘bob2′),’/home/bob2’,true);
INSERT 0 1
sample_rails_app_development=> select * from users;
id | username | password | homedir | ftp_disabled | created_at | updated_at
—-+———-+———————————-+————+————–+————+————
2 | bob | 9f9d51bc70ef21ca5c14f307980a29d8 | /home/bob | f | |
3 | bob2 | 436187b1cb437f7ddb11952542e351a4 | /home/bob2 | t | |
(2 rows)
sample_rails_app_development=> \q
freebsd-vm$
[/text]
Next, we need to create bob’s virtual home directory (as root).
[text]
freebsd-vm# mkdir -p /usr/local/www/apache22/data/bob
freebsd-vm# chown vsftpd:vsftpd /usr/local/www/apache22/data/bob
[/text]
Now we can login as bob (and not bob2).
[text]
freebsd-vm$ ftp localhost
Trying 127.0.0.1…
Connected to localhost.
220 Welcome to FTP server
Name (localhost:jasonn): bob
331 Please specify the password.
Password:
230 Login successful.
Remote system type is UNIX.
Using binary mode to transfer files.
ftp> pwd
Remote directory: /
ftp> quit
221 Goodbye.
freebsd-vm$ ftp localhost
Trying 127.0.0.1…
Connected to localhost.
220 Welcome to FTP server
Name (localhost:jasonn): bob2
331 Please specify the password.
Password:
530 Login incorrect.
ftp: Login failed.
ftp> quit
221 Goodbye.
freebsd-vm$
[/text]
Now we need a script that will setup the FTP user’s home directory. (Run this in your Rails project’s home directory)
[text]
freebsd-vm# echo "User.write_ftp_configs" >> write_ftp_configs
freebsd-vm#
[/text]
Change the User model in your Rails application
[text]
freebsd-vm$ vi app/models/user.rb
class User < ActiveRecord::Base
require ‘ftools’
def self.write_ftp_configs
User.find(:all, :conditions => ["ftp_disabled is false"]).each do |user|
unless File.directory?(user.homedir)
# If their home directory doesn’t exist, create it
# and chown the directory to vsftpd (1002)
File.makedirs user.homedir
File.chown(1002, 1002, user.homedir)
end
if File.directory?("/etc/vsftpd/users")
unless Dir.entries("/etc/vsftpd/users").include?(user.homedir)
File.open("/etc/vsftpd/users/#{user.username}", ‘w’) {|f|
f.write("local_root=#{user.homedir}\n");
}
end
end
end
end
end
[/text]
Now you just need to setup a cronjob to run as root. This script should cd to your rails root directory and run “script/runner write_ftp_configs”.
WARNING: There may be security implications with this script. If a user has their homedir set to something “sensitive” this script will create that directory for them. Make sure you trust anyone that can add users via your Rails application. You could fix this by adding a validation on the homedir field so that it’s only a subdirectory of a given directory (i.e. $RAILS_ROOT/upload) or something.
Installing Ruby on Rails in FreeBSD with Postgres
After setting up a minimal FreeBSD install, I want to get Ruby on Rails up and running.
Let’s see what’s available in the ports tree.
[text]
freebsd-vm# make search key=gem | grep Path: | grep ruby
Path: /usr/ports/audio/rubygem-mp3info
Path: /usr/ports/benchmarks/rubygem-railsbench
Path: /usr/ports/databases/ruby-dbd_pg
Path: /usr/ports/databases/ruby-rdbc1
Path: /usr/ports/databases/rubygem-activerecord
[…]
Path: /usr/ports/devel/ruby-gemfinder
Path: /usr/ports/devel/ruby-gems
Path: /usr/ports/devel/rubygem-activesupport
[…]
Path: /usr/ports/www/rubygem-scrubyt
Path: /usr/ports/www/rubygem-taggable
freebsd-vm#
[/text]
The ruby-gems port looks promising.
[text]
freebsd-vm# cd devel/ruby-gems
freebsd-vm# cat pkg-descr
a package management framework for the Ruby programming language
An application or library is packaged into a gem, which is
a single installation unit.
RubyGems entirely manages its own filesystem space, rather
than installing files into the "usual" places. This enables
greater functionality and reliability.
Using RubyGems, you can:
– download and install Ruby libraries easily
– not worry about libraries A and B depending on
different versions of library C
– easily remove libraries you no longer use
– have power and control over your Ruby platform!
WWW: http://docs.rubygems.org/
freebsd-vm#
[/text]
Let’s install it. The install requires ruby to be installed, so it installs that for us (if it’s not currently installed). I enabled RDOC and DEBUG and disabled IPV6.
(This may take a while, go grab some coffee)
[text]
freebsd-vm# make install
=> rubygems-1.2.0.tgz doesn’t seem to exist in /usr/ports/distfiles/ruby.
=> Attempting to fetch from http://rubyforge.rubyuser.de/rubygems/.
rubygems-1.2.0.tgz 100% of 241 kB 138 kBps
===> Extracting for ruby18-gems-1.2.0_1
[…]
If `gem` was installed by a previous RubyGems installation, you may need
to remove it by hand.
===> Registering installation for ruby18-gems-1.2.0_1
freebsd-vm#
[/text]
Now we need to install rails.
[text]
freebsd-vm# gem install rails
Successfully installed rake-0.8.1
Successfully installed activesupport-2.1.0
Successfully installed activerecord-2.1.0
Successfully installed actionpack-2.1.0
[…]
Installing RDoc documentation for actionpack-2.1.0…
Installing RDoc documentation for actionmailer-2.1.0…
Installing RDoc documentation for activeresource-2.1.0…
freebsd-vm#
[/text]
We need to install postgresql-server.
[text]
freebsd-vm# make search key=postgres | grep Path: | grep server
Path: /usr/ports/databases/aolserver-nspostgres
Path: /usr/ports/databases/erserver
Path: /usr/ports/databases/postgresql73-server
Path: /usr/ports/databases/postgresql74-server
Path: /usr/ports/databases/postgresql80-server
Path: /usr/ports/databases/postgresql81-server
Path: /usr/ports/databases/postgresql82-server
Path: /usr/ports/databases/postgresql83-server
Path: /usr/ports/finance/tinyerp-server
Path: /usr/ports/net/sipxcommserverlib
Path: /usr/ports/net-im/iserverd
freebsd-vm#
[/text]
Let’s install version 8.3. In the options that came up, I selected Build with PAM support and left the other defaults.
[text]
freebsd-vm# cd databases/postgresql83-server/
freebsd-vm# make install
cd /usr/ports/databases/postgresql83-server && make config;
[…]
For more information, and contact details about the security
status of this software, see the following webpage:
http://www.postgresql.org/
freebsd-vm#
[/text]
We need to set postgres to run at startup.
[text]
freebsd-vm# echo ‘postgresql_enable="YES"’ >> /etc/rc.conf
freebsd-vm#
[/text]
Initialize the database.
[text]
freebsd-vm# /usr/local/etc/rc.d/postgresql initdb
The files belonging to this database system will be owned by user "pgsql".
This user must also own the server process.
The database cluster will be initialized with locale C.
The default text search configuration will be set to "english".
creating directory /usr/local/pgsql/data … ok
creating subdirectories … ok
selecting default max_connections … 40
selecting default shared_buffers/max_fsm_pages … 28MB/179200
creating configuration files … ok
creating template1 database in /usr/local/pgsql/data/base/1 … ok
initializing pg_authid … ok
initializing dependencies … ok
creating system views … ok
loading system objects’ descriptions … ok
creating conversions … ok
creating dictionaries … ok
setting privileges on built-in objects … ok
creating information schema … ok
vacuuming database template1 … ok
copying template1 to template0 … ok
copying template1 to postgres … ok
WARNING: enabling "trust" authentication for local connections
You can change this by editing pg_hba.conf or using the -A option the
next time you run initdb.
Success. You can now start the database server using:
/usr/local/bin/postgres -D /usr/local/pgsql/data
or
/usr/local/bin/pg_ctl -D /usr/local/pgsql/data -l logfile start
freebsd-vm#
[/text]
Start up the database.
[text]
freebsd-vm# /usr/local/etc/rc.d/postgresql start
freebsd-vm#
[/text]
Verify that postgres is working.
[text]
freebsd-vm# createdb test -U pgsql
freebsd-vm# dropdb test -U pgsql
freebsd-vm#
[/text]
There is a postgres GEM. Let’s install it.
[text]
freebsd-vm# gem install postgres
Building native extensions. This could take a while…
Successfully installed postgres-0.7.9.2008.01.28
1 gem installed
Installing ri documentation for postgres-0.7.9.2008.01.28…
Installing RDoc documentation for postgres-0.7.9.2008.01.28…
freebsd-vm#
[/text]
Now we can create a rails application (I switched to a non-root user).
[text]
freebsd-vm$ rails -d postgresql sample_rails_app
create
create app/controllers
create app/helpers
create app/models
create app/views/layouts
create config/environments
[…]
create log/server.log
create log/production.log
create log/development.log
create log/test.log
freebsd-vm$
[/text]
Setup the postgres user for your application
[text]
freebsd-vm$ createuser –username pgsql
Enter name of role to add: sample_rails_app
Shall the new role be a superuser? (y/n) n
Shall the new role be allowed to create databases? (y/n) y
Shall the new role be allowed to create more new roles? (y/n) n
freebsd-vm$ cd sample_rails_app/
freebsd-vm$ rake db:create
(in /usr/home/jasonn/sample_rails_app)
freebsd-vm$
[/text]
Create a User scaffold
[text]
freebsd-vm$ script/generate scaffold User username:string password:string homedir:string ftp_disabled:boolean
exists app/models/
exists app/controllers/
exists app/helpers/
create app/views/users
exists app/views/layouts/
exists test/functional/
exists test/unit/
exists public/stylesheets/
create app/views/users/index.html.erb
create app/views/users/show.html.erb
create app/views/users/new.html.erb
create app/views/users/edit.html.erb
create app/views/layouts/users.html.erb
create public/stylesheets/scaffold.css
create app/controllers/users_controller.rb
create test/functional/users_controller_test.rb
create app/helpers/users_helper.rb
route map.resources :users
dependency model
exists app/models/
exists test/unit/
exists test/fixtures/
create app/models/user.rb
create test/unit/user_test.rb
create test/fixtures/users.yml
create db/migrate
create db/migrate/20080902231538_create_users.rb
freebsd-vm$ rake db:migrate
(in /usr/home/jasonn/sample_rails_app)
== 20080902231538 CreateUsers: migrating ======================================
— create_table(:users)
NOTICE: CREATE TABLE will create implicit sequence "users_id_seq" for serial column "users.id"
NOTICE: CREATE TABLE / PRIMARY KEY will create implicit index "users_pkey" for table "users"
-> 0.0645s
== 20080902231538 CreateUsers: migrated (0.0665s) =============================
freebsd-vm$
[/text]
Start up the server and visit http://localhost:3000/users (you may need to substitute your IP address)
[text]
freebsd-vm$ script/server
=> Booting WEBrick…
=> Rails 2.1.0 application started on http://0.0.0.0:3000
=> Ctrl-C to shutdown server; call with –help for options
[…]
[/text]
Create some users, your Rails app is up and running.
Updated 12/15/2011
– Updated outdated link to setting up FreeBSD in a parallels vm
Updating the ports tree in FreeBSD
After setting up a minimal FreeBSD install, I want to update the ports tree to the latest available.
FreeBSD provides a program to do this. It’s called cvsup (cvs update). To find the program, I search the ports tree.
[text]
freebsd# cd /usr/ports
freebsd# make search key=cvsup | grep Path:
Path: /usr/ports/chinese/auto-tw-l10n
Path: /usr/ports/lang/ezm3
Path: /usr/ports/misc/instant-server
Path: /usr/ports/net/csup
Path: /usr/ports/net/cvsup
Path: /usr/ports/net/cvsup-mirror
Path: /usr/ports/net/cvsup-without-gui
Path: /usr/ports/net/cvsupchk
Path: /usr/ports/ports-mgmt/port-authoring-tools
Path: /usr/ports/ports-mgmt/port-maintenance-tools
Path: /usr/ports/sysutils/desktopbsd-tools
Path: /usr/ports/sysutils/fastest_cvsup
Path: /usr/ports/sysutils/maint
freebsd#
[/text]
I want the cvsup without the gui, so I change into that directory and install it.
[text]
freebsd# cd net/cvsup-without-gui/
freebsd# sudo make install
===> Extracting for cvsup-without-gui-16.1h_4
=> MD5 Checksum OK for cvsup-snap-16.1h.tar.gz.
=> SHA256 Checksum OK for cvsup-snap-16.1h.tar.gz.
===> Patching for cvsup-without-gui-16.1h_4
===> Applying FreeBSD patches for cvsup-without-gui-16.1h_4
[…]
===> Registering installation for cvsup-without-gui-16.1h_4
===> SECURITY REPORT:
This port has installed the following files which may act as network
servers and may therefore pose a remote security risk to the system.
/usr/local/sbin/cvsupd
/usr/local/bin/cvsup
/usr/local/bin/cvpasswd
If there are vulnerabilities in these programs there may be a security
risk to the system. FreeBSD makes no guarantee about the security of
ports included in the Ports Collection. Please type ‘make deinstall’
to deinstall the port if this is a concern.
For more information, and contact details about the security
status of this software, see the following webpage:
freebsd#
[/text]
I next need a config file to make cvsup update the ports tree.
[text]
#vi /root/ports-supfile
# IMPORTANT: Change the next line to use one of the CVSup mirror sites
# listed at http://www.freebsd.org/doc/handbook/mirrors.html.
*default host=cvsup5.us.FreeBSD.org
*default base=/var/db
*default prefix=/usr
*default release=cvs tag=.
*default delete use-rel-suffix
# If you seem to be limited by CPU rather than network or disk bandwidth, try
# commenting out the following line. (Normally, today’s CPUs are fast enough
# that you want to run compression.)
*default compress
## Ports Collection.
#
# The easiest way to get the ports tree is to use the "ports-all"
# mega-collection. It includes all of the individual "ports-*"
# collections,
ports-all
[/text]
Now we run rehash to rescan our PATH variable for new commands, then run cvsup to update our ports tree.
[text]
freebsd# rehash
freebsd# cvsup /root/ports-supfile
Connected to cvsup5.us.FreeBSD.org
Updating collection ports-all/cvs
[…]
Finished successfully
freebsd#
[/text]
Now our ports tree is up to date. If you want to see what ports you’ve installed that have security updates available, run “/usr/local/sbin/portaudit”. It will list any ports that need updating. If you get command not found, cd to /usr/ports/ports-mgmt/portaudit and do a “sudo make install”.
Setting up a FreeBSD VM with Parallels under OS X Leopard
To read this post with screen shots, use one of the following links:
My goal is to have a FreeBSD 7.0 based virtual machine running under Parallels on my OS X 10.5 Leopard iMac.
Open Parallels and select File -> New
As my server is just for local development, I didn’t give it a bunch of RAM. You may change this if you have more available RAM. I selected 256MB. Click Next.
This is a new VM, so I want to create a new hard disk image. Click Next.
Again, this is only a development box, so I used only 5GB for a hard drive. I would leave it as Expanding unless you want to pre-allocate the space on your mac. Click Next.
The next window gives networking options. If you need other machines on your local network to access this machine, select Bridged Ethernet, otherwise use Shared Networking. Click Next.
You can name the virtual machine whatever you want. You can uncheck the Create icon on your Desktop if you want. I would not share this virtual machine with other users. Click Next.
This next screen is a user preference. Do you want your mac to give preference to OS X applications or the FreeBSD vm’s applications? On a desktop, I think it’s fine to leave it with the recommended option. Click Next.
You can choose how to install the OS. If you have a physical disk, choose Real CD/DVD and insert it into your Mac’s disk drive. I downloaded the FreeBSD ISOs so I chose ISO image (use disc1). Click Finish.
Your vm should start booting.
Once the installation starts, you need to select your country. Use the arrow keys (up and down) to select your contry, then hit Enter.
Arrow down to Custom and hit Enter
Arrow down to Partition and hit Enter to go into fdisk.
Hit F to dedicate the entire (virtual) disk to FreeBSD. When the prompt comes up, hit Enter.
Hit Q to finish.
Leave the BootMgr default and hit Enter.
Arrow down to Label and hit Enter.
You will get a screen about creating BSD partitions.
Hit C to create a partition. Type in 256M for the size. Hit Enter.
In the partition type window, arrow down until Swap is highlighted. Hit Enter.
Hit C to create a partition. Leave the default size entered and hit Enter.
Leave FS (A file system) highlighted and hit Enter.
For the mount point, type in / and hit Enter.
Your Disklabel screen should now look like the following (assuming a 5GB disk drive)
Hit Q to finish.
Arrow down to Distributions and hit Enter.
Arrow down until Minimal is highlighted. Hit space to select this option.
Arrow down to Custom and hit space to select it.
In this menu you can select the packages you want installed. For a base level system, I install base, kernels, man and catman. I also install the ports option so I can install additional software from the FreeBSD ports collection. Arrow to each option you want to install and hit
Arrow up to Exit and hit Enter to continue.
(Optional) If you need to change the installation media (default is CD/DVD), highlight Media and hit Enter.
(Optional) Select the installation media you would like to use and hit Enter to continue.
Arrow down to Commit and hit Enter.
At the Last Chance! screen hit Enter to start the installation.
Go grab a coffee and take a break.
After you get back, you should see a window asking if you want to further configure the box. Hit
You probably want to set a root password (blank by default). Arrow down to Root Password and hit Enter.
Type in a good password when prompted. It will ask you to retype the password to make sure you didn’t misstype the first time.
(Optional) You may want to make a non-root user. Arrow down to User Management and hit Enter.
(Optional) Arrow down to User and hit Enter.
Fill out the fields for your user (
The other options are mostly self explanatory. You probably want to set your Time Zone.
You also need to setup your networking. Arrow down to Networking and hit Enter.
Arrow down to Interfaces and hit Enter.
Select the Novell NE1000/2000 highlighted and hit Enter.
Do you need IPv6? Probably not, leave No highlighted and hit Enter.
You should enable DHCP, as that is how Parallels gives it an IP address. Hit
You should give your vm a hostname. The IPv4 Gateway and IP info should be auto filled in.
Hit
You probably want SSH access, so hit arrow down to highlight ssh and hit Enter.
You may want to enable the ntpdate service. It will keep your system clock synced. Highlight Ntpdate and hit Enter.
Select a server to synchronize with. Pick one that is “close” to you. Hit Enter to continue.
When you’re done selecting services, hit
Arrow up to Exit and hit Enter.
Add iSCSI drive to a system
We’re moving from one netapp to a newer one. Previously, I’ve dealt with NFS mounts, rsyncing them, then unmounting the old NFS share and mounting the new one.
The process for iSCSI drives is a little different because they aren’t mounted via NFS.
I started out by logging into the SuSE 9.3 box and editing /etc/iscsi.conf. I added one line to the file:
[text]
DiscoveryAddress=1.2.3.4
[/text]
If you need to create a new group, go to LUNs -> Initiator Groups -> Manage. Click Add Initiator Group. The Group Name should be something descriptive, i.e. “SubversionUsers” (no spaces allowed here). The Type should be iSCSI, the Operating System depends (I chose Linux). For the Initiators list, on your Linux box run “cat /etc/initiatorname.iscsi” and copy and paste the InitatorName (iqn.1987-05.com.cisco:01.0001bee55337 below) into the Initiators box.
[text]
svn:~ # cat /etc/initiatorname.iscsi
## DO NOT EDIT OR REMOVE THIS FILE!
## If you remove this file, the iSCSI daemon will not start.
## If you change the InitiatorName, existing access control lists
## may reject this initiator. The InitiatorName must be unique
## for each iSCSI initiator. Do NOT duplicate iSCSI InitiatorNames.
InitiatorName=iqn.1987-05.com.cisco:01.0001bee55337
svn:~ #
[/text]
I then needed to allow this box to load the Netapp share. Logging into the Netapp via the web, I went to LUNs -> Manage. This was an existing LUN (you could add a new LUN if needed) so I clicked on the LUN name. I then clicked on Map LUN, then Add Groups to Map. Click the group you want to add and click Add. On the following page, in the LUN ID box you need to provide a unique (to this LUN) ID. I chose 500.
Now on the Linux box, restart iSCSI.
Show mounted filesystems on a Netapp
We’re working on moving from an old Netapp to a new Netapp. Before doing so, we need to make sure that no systems have any mount points on the old filer still mounted.
On a regular/unix nfs server, you would login to the box and run “showmount -a” which queries the mount daemon. The netapp systems don’t offer the showmount command though.
I found a mailing list article that explained you can run “showmount -a XYZ” where XYZ is the hostname/ip of your netapp filer.
[text]
roadrunner:~ # showmount -a 172.16.2.6
All mount points on 172.16.2.6:
10.1.112.17:/vol/root
172.16.13.16:/vol/space/offsite.backup
172.16.13.18:/vol/space/offsite.backup
172.16.13.5:/vol/space/db.preprod
172.16.13.5:/vol/space/offsite.backup
172.16.13.7:/vol/space/offsite.backup
172.16.23.1:/vol/space/endeca.preprod
172.16.23.6:/vol/space/db.preprod
172.16.23.6:/vol/space/offsite.backup
172.16.3.6:/vol/root
mailhost:/vol/space/imagemgr
roadrunner:~ #
[/text]
Now I know what hosts I need to check before deprovisioning this Netapp.
Update: From the article, I missed the caveat. NFS is stateless, so some unix hosts could still have the system mounted, but not actively use the mount.
As suggested, I turned the nfs.per_client_stats.enable bit on, and now I’ll just wait and see who is actively using the Netapp.
[text]
netapp> options nfs
[…]
nfs.netgroup.strict off
nfs.per_client_stats.enable off
nfs.require_valid_mapped_uid off
[…]
netapp> options nfs.per_client_stats.enable on
netapp> nfsstat -l
172.16.2.2 <hostname unknown> NFSOPS = 6 ( 0%)
172.16.3.2 mailhost NFSOPS = 8 ( 0%)
netapp>
[/text]
DNS Resolver
I had a list of domains that needed their MX records updated. I first wanted to make sure that our DNS servers were authoritative for those zones.
I used Perl and the Net::DNS CPAN module to figure out the NS records for each domain.
[text]
#!/usr/bin/perl
use Net::DNS;
my $resolver = Net::DNS::Resolver->new;
my $query = "";
my $domain = "";
open(FILE, "</tmp/domains.txt");
while(<file>) {
chomp;
$domain = $_;
$query = $resolver->query($domain, "NS");
print $domain;
if($query) {
foreach my $rr ($query->answer) {
next unless $rr->type eq "NS";
print ",", $rr->nsdname;
}
print "\n";
} else {
print ",DOES NOT RESOLVE\n";
}
}
[/text]
Setting up IronRuby
I’m playing around with learning some Microsoft technologies to broaden my knowledge base. I figured I’d start with Ruby, as it’s something I sort of already know and gives me visibility into Microsoft tools.
From my research, Microsoft is working on a project called IronRuby.
To get started, I’m following the directions here.