Setting up a FreeBSD VM with Parallels under OS X Leopard
To read this post with screen shots, use one of the following links:
My goal is to have a FreeBSD 7.0 based virtual machine running under Parallels on my OS X 10.5 Leopard iMac.
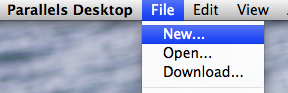
Open Parallels and select File -> New
As my server is just for local development, I didn’t give it a bunch of RAM. You may change this if you have more available RAM. I selected 256MB. Click Next.
This is a new VM, so I want to create a new hard disk image. Click Next.
Again, this is only a development box, so I used only 5GB for a hard drive. I would leave it as Expanding unless you want to pre-allocate the space on your mac. Click Next.
The next window gives networking options. If you need other machines on your local network to access this machine, select Bridged Ethernet, otherwise use Shared Networking. Click Next.
You can name the virtual machine whatever you want. You can uncheck the Create icon on your Desktop if you want. I would not share this virtual machine with other users. Click Next.
This next screen is a user preference. Do you want your mac to give preference to OS X applications or the FreeBSD vm’s applications? On a desktop, I think it’s fine to leave it with the recommended option. Click Next.
You can choose how to install the OS. If you have a physical disk, choose Real CD/DVD and insert it into your Mac’s disk drive. I downloaded the FreeBSD ISOs so I chose ISO image (use disc1). Click Finish.
Your vm should start booting.
Once the installation starts, you need to select your country. Use the arrow keys (up and down) to select your contry, then hit Enter.
Arrow down to Custom and hit Enter
Arrow down to Partition and hit Enter to go into fdisk.
Hit F to dedicate the entire (virtual) disk to FreeBSD. When the prompt comes up, hit Enter.
Hit Q to finish.
Leave the BootMgr default and hit Enter.
Arrow down to Label and hit Enter.
You will get a screen about creating BSD partitions.
Hit C to create a partition. Type in 256M for the size. Hit Enter.
In the partition type window, arrow down until Swap is highlighted. Hit Enter.
Hit C to create a partition. Leave the default size entered and hit Enter.
Leave FS (A file system) highlighted and hit Enter.
For the mount point, type in / and hit Enter.
Your Disklabel screen should now look like the following (assuming a 5GB disk drive)
Hit Q to finish.
Arrow down to Distributions and hit Enter.
Arrow down until Minimal is highlighted. Hit space to select this option.
Arrow down to Custom and hit space to select it.
In this menu you can select the packages you want installed. For a base level system, I install base, kernels, man and catman. I also install the ports option so I can install additional software from the FreeBSD ports collection. Arrow to each option you want to install and hit
Arrow up to Exit and hit Enter to continue.
(Optional) If you need to change the installation media (default is CD/DVD), highlight Media and hit Enter.
(Optional) Select the installation media you would like to use and hit Enter to continue.
Arrow down to Commit and hit Enter.
At the Last Chance! screen hit Enter to start the installation.
Go grab a coffee and take a break.
After you get back, you should see a window asking if you want to further configure the box. Hit
You probably want to set a root password (blank by default). Arrow down to Root Password and hit Enter.
Type in a good password when prompted. It will ask you to retype the password to make sure you didn’t misstype the first time.
(Optional) You may want to make a non-root user. Arrow down to User Management and hit Enter.
(Optional) Arrow down to User and hit Enter.
Fill out the fields for your user (
The other options are mostly self explanatory. You probably want to set your Time Zone.
You also need to setup your networking. Arrow down to Networking and hit Enter.
Arrow down to Interfaces and hit Enter.
Select the Novell NE1000/2000 highlighted and hit Enter.
Do you need IPv6? Probably not, leave No highlighted and hit Enter.
You should enable DHCP, as that is how Parallels gives it an IP address. Hit
You should give your vm a hostname. The IPv4 Gateway and IP info should be auto filled in.
Hit
You probably want SSH access, so hit arrow down to highlight ssh and hit Enter.
You may want to enable the ntpdate service. It will keep your system clock synced. Highlight Ntpdate and hit Enter.
Select a server to synchronize with. Pick one that is “close” to you. Hit Enter to continue.
When you’re done selecting services, hit
Arrow up to Exit and hit Enter.